Tuesday, April 19, 2011

Craft of the Week-7

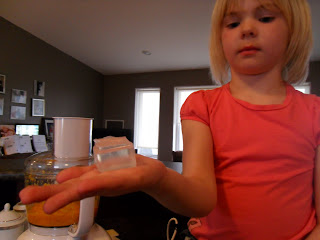
So usually for the "COTW" I go on my favorite websites and see which ones are do-able and share them with you. This week I let my 6 year old Emma pick and this is the one she chose!
DIY Orange Soap

you will need:

- assorted citrus, berries, or herbs

- paper coffee filters, if using herbs

- clean, dry containers like juice boxes or yogurt cups

- heat resistant glass measuring cup or bowl

- non-stick spray


- glycerin soap base (note:do NOT try to cross the boarder with that. They think its explosives. funny story)


The instructions shown are just for the citrus soap. Feel free to go to marthastewart.com for the other instructions.


1. Puree oranges(i used 4 christmas oranges and my food processor)


2. To determine how much glycerine soap base you need, fill mold(I used an empty juice box) with water, then pour it into your measuring cup. Dump the water and dry out your measuring cup.


3. Cut up your clear glycerin into cubes and melt it 30 seconds at a time in the microwave. Make sure it does not boil, or it will turn to dough...and smell bad....

4. Once its all melted, add your orange puree(I did 2 tbsp) and stir. Then pour your soap into your mold and let it sit at room temp for about 3 hours.

Thursday, April 14, 2011

Craft of the Week-6

So as you can tell, I'm a little behind with my "craft of the week" so I tried to find a REALLY good one for you guys!

With Easter on fast approach, I have been "slightly" annoyed at all the attention going to chocolate(one of my weakness') and bunnies. I've been trying to stress to my kids the importance of remembering Jesus dying for our sins and that it is so very special that he loved us so much. Its very easy to "remember" Jesus, but do we really think about it? I have had people near to me pass away and have always struggled with the thought of them being forgotten. How much MORE should we be remembering what Jesus did for us?!


This craft is meant for just any old book, but for those of you who have little ones with their own bibles(and feel ambitious enough), to make this cover for their bibles and I encourage you while you are doing this craft, to talk about Jesus. He loves us soo much.


Book Blankets

(please read ALL of the instructions before you start, if you want to do the optional pen holder, or pocket. It tricked me!)


...you will need:

- felt (or, a fun fabric!)

- scissors

- ruler

- pins

embroidery needle and thread(feel free to call me, I have TONS)

- button(optional)

- self adhesive Velcro dot(dollarama)


1. To make a cover, open your chosen book and measure the width and height. Add one inch to each measurement and cut out a piece of felt with those dimensions. For the inside flaps, cut two additional pieces of felt the same height as the main piece and two0thirds the width of the closed book's front cover.


2. Lay an inside flap on top of each end of the main piece and pin the flaps and the main piece together. With embroidery thread, sew a running stitch about 1/4 inch to 3/8 inch from the edge around the entire border.


3. If you like, add one of these extras:


Notebook pocket: Before attaching the inside flaps, cut a piece of felt that's 1 1/2 inches wider and 1/2 inch shorter that's your notepad. Sew it in the center of what will be the front cover of the book.


Faux Button Closure: Before attaching the inside flaps, cut a strap that's 1 1/2 inch wide and as long as the width of an inside flap. Sandwich the strap between the back flap and the cover and pin it in place, then sew around the end of the strap and sew on a button. Affix a self-adhesive Velcro dot to the strap and the front of the cover.


Pen holder: After the cover is finished and on the book, cut a 1 3/4 inch square out of felt. With the book closed, lay the square over a pen on the book's spine and pin it in place. Take the cover off the book, then sew on the square.

Tuesday, March 29, 2011

Craft of the Week-5

Eggshell Flowerpots


Young gardeners can use eggshells as pots to start seeds and coffee-stirrer tags to foretell what will pop up where! All you need is egg shells, dirt, seeds and eager little hands!


1. Plant seeds according to package instructions, and nestle planters in an egg carton on a sunny window sill where they can be watered easily.

2. The first leaves to sprout will be the cotyledons or "seed leaves" which supply nutrients to the young plant until the first true leaves (resembling those of the parent plant) appear.

3. When plants have grown to about 3 inches and have at least two sets of true leaves, they are ready to be transplanted to the garden. (remove them from the eggshells first!)

Thursday, March 17, 2011

Craft of the Week-4 Modern Art

This craft I saw on a CBC show called "Artzooka" which I really like! They have really neat ideas and the host is kind of cute.... :) So this is a craft that is kid friendly and when its done you will have your own modern art piece to proudly hang on the wall!

Modern Art
what you will need:
- empty chip bags(rinsed out)
- duct tape
- cardboard box (cereal box works)
- scissors


A variety of different coloured bags is best


cut the bags into long strips, about an inch thick. This is Emma cutting and pulling pieces apart. (you can have some thinner or thicker. It will give it a nice effect)


Cut your box so that it resembles a "lid" keeping the sides intact. Cover the sides with duct tape (any colour is fine)

Cut the middle of the box out and fold strips of duct tape and tape them across the box to make a frame

Next weave your strips of chip bags inbetween the duct tape frame. Across first, then up and down.
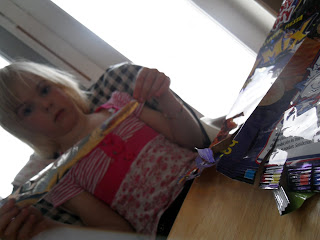
She enjoyed herself a bit more then it looks like in this picture!

Trim off the excess and duct tape the sides to give it a nice finished edge

Monday, March 7, 2011

Craft of the Week-3

So the craft of the week this week comes from the wise and slightly evil Martha. I get e-news from her regularly and I LOVED this craft so I had to show you!! I would have taken pictures of myself doing this but their pictures are much prettier.

Hardware Handbag (be aware that the stuff in brackets is my own opinion;)


Tools and Materials:

- four small hinges

- canvas bag with handles(find fun canvas material to make it prettier)

- needle and thread to match

- pencil or pen

- masking tape

- craft knife(like an exacto)

- fabric glue

skinny belt(I found mine at superstore!)

- small lock (dollarama baby!)

spray paint (optional)


How-To

1. Open hinges and stitch each to bag, directly below where each handle end is secured. Reinforce by going through hinge holes several times with thread.

2. Turn bag inside out. Mark two points on each side of bag: 3 inches from top of bag and 1 inch from each side of seam. Place a piece of masking tape over each point. With a craft knife, cut iniform Xs over each point, with the height of each X slightly taller than the width of the belt you intend to use.

3. Fold back the points created by each X, and glue to the inside of bag with fabric glue.

4. Loop belt through the four holes, and buckle. Attach lock to belt. (Tip: if you want to, you can spray paint your lock a fun color to match)
Now, if this is confusing to you, or you're like me and need visuals, feel free to go on the marthastewart.com website and search "hardware handbag" to watch a video of how to make this. I will be posting pictures of the one that I made ASAP. Hope it inspires you!

Wednesday, February 16, 2011

Craft of the Week - Part 2


So my family of four is off on our first ever family vacation to somewhere else other than camp (which we love). We are off to Arizona to thaw out and spend some quality time with my husbands family so OF COURSE I have to think of a fun craft related to family vacations and here it is! (please note I did not think of this one myself, I was at Rosenort Moms Group and Karen Hildebrandt gave me the idea, and I didn't have a camera so you have to use your imagination)

Road Trip on a String


First get yourself some elastic or you can use string or yarn. I prefered elastic because then you can stretch it the length of your vehicle


Next make yourself a little paper car or van to represent your happy family vehicle! I got this template googling "paper van"


Next write, or type all of the major cities and stops you will be driving through and cut them out leaving lots of paper on the top and bottom of the writing. (i cut mine out in the shape of the state or province we are driving through)


Next tape or hot glue gun(love that glue gun!!) all your destinations on your elastic or string and place your vehicle around the elastic so that it can move freely. (sorry I have NO picture to show)

Now you have a fun way of showing your kids how far we have come, whats coming up and how far you have to go!! Hope it inspires you! Thanks for taking interest.


Wednesday, February 9, 2011

Craft of the week

So with valentines day coming up I figured the craft this week SHOULD have something to do with it. Please forgive the pictures. It was my first attempt and took these myself.
Felt Fortune Cookies
Start off with a sheet(I used 8.5x11) of pink or red felt

Using anything you have around the house (Ziplock lids!), trace circles with a pen. Cut out the circles.

Cut strips from the leftover felt the length of the circles

Using any sort of heavy wire (I used straighten out paper clips!), hot glue them to the center of your circle.

Next, hot glue gun the "leftover strip" to the middle to hide the wire. You can do the wire and felt all at once to save time. (if you're wondering why I have three arms, my 3 year old, Leah was helping me...)

Fold in half...

Holding the felt in your thumb and index finger, bend the wire away from you

These are ones I made with different colors of felt. I put a little "sexy" fortune in each one like; "I see you getting lucky tonight" and put them in a bowls in our ensuit and bedroom. Hope you have lots of fun making these cute little "cookies" and putting your own "sexy" fortunes in!