Wednesday, June 8, 2011

Craft of the Week - 12

Yarn Flowers


what you will need:

- embroidery floss
- yarn

- green cloth covered floral wire

- green floral tape

- scissors

1.For stamens, wind floss four times around two fingers: for petals, wind yarn fifteen times around three fingers.

2. Center floss on top of yarn. Fold 9 to 10 inches of floral wire in half.

3. Hook wire over center of yarn and floss; pinch tight, and twist to create the stem.

4. Snip looped ends of floss and yarn, and fluff up!

5. Cinch at base of flower with floral tape and cover stem.
6. Trim stamens short, adjust petals, trimming to desired length. Tie flowers together and attach a safety pin for a corsage. Or use more floral tape for a vine to crawl along the handle of a straw basket.

If thats not the bees knees, I don't know what is!!

Thursday, May 26, 2011

Craft of the Week-11

Striped Bangle Bracelets


Use a basic decoupage process to ass bright tissue-paper stripes to inexpensive wooden bracelets.


What you need:

- paper towel
- white acrylic paint(dollarama!)

- unfinished wooden bangles($2 at Micheals)

- small bowls

- tissue paper cut into 3 inch stripes for small bangles, 6 inch for big

- Mod Podge craft adhesive (if you don't have this yet, now is the time!!)

- craft knife


1. Whitewash bangle: Dampen paper towel and dip into paint. Smooth paint onto the surface of the bangle, inside and out. Let dry.


2. Balance the bangle on a small bowl. For each stripe, brush one side of tissue with adhesive and smooth the strip onto the bangle. Leave the excess tissue at inner edge. Let dry.3. Trim excess tissue using craft knife. Brush adhesive over outside of bracelet to seal. Let dry. Ta Da! Your done! Wasn't that super easy!!??

Wednesday, May 18, 2011

Craft of the Week-10

"Homegrown" Tomato Pincushions


These whimsical sewing-box staples are just as sweet as garden-grown tomatoes, and you don't have to wait until summer to enjoy them!

What you will need:

- fabric(red or green pattern are nice)

- knowledge of sewing(which I am lacking)

- sewing paraphernalia(needles, thread, etc.)

- cotton batting(filler)

1. Cut a rectangle of fabric on the bias thats twice as long as it is wide. (the largest i made was 3 1/4 inches in diameter and required a 10-by-5 inch piece). With fabric facing right side up, fold in half as shown, and join ends with a 1/4 seam. Sew a running stitch around the top edge; tightly pull thread to cinch fabric, and secure with stitches.


2. Turn pouch right side out. Stuff with batting. Sew a running stitch around the open end; pull thread to cinch fabric. Tack shut with a few stitches and knot. To flatten, double-thread a cording needle with crochet thread and pull it through the "core" a few times. Mimic a tomato's fluted details by wrapping the thread around the cushion and back through the core several times. Knot the thread at the top to finish.


I would LOVE to see pictures if any of you sewers(is that right?) attempt this! I know you are out there! Patti, I'm talking to you!!

Friday, May 13, 2011

Craft of the Week-9

So you know how we(or at least me) never know what to get "daddy"(your husband) for fathers day. Well I have given up trying and decided to go straight to his stomach. These are wicked cute cupcakes that will make him smile...


Daddy's Day Cupcakes

you will need:

- chocolate cake mix(and whatever is required with that)

- M&Ms

- shredded coconut

- green and grey food coloring

- assorted chocolates(like Rolos or Pot of Gold)

- black(gross!) or grape string licorice

- jellybeans or mike and ikes

- icing

- chocolate sauce


1. Make the cupcakes as directed on the box.

2. While they are cooling, mix a small amount of green food coloring with your coconut.

3. Once the cupcakes are cooled you can go to town decorating them like the ones shown below!


This one has icing and green colored coconut covering it with a chocolate lawnmower on top


These ones are made to look like a grill with grey icing and various gummy candies to look like kabobs and the jellybeans make good hotdogs with a toothpick dipped in chocolate sauce and "grilled" on top of the jellybeans. Happy Father's Day!

Friday, May 6, 2011

Craft of the Week-8

So, i was thinking about what to do this week and seeing as its Mothers Day(really it should be called Mother-in-Laws day) and I am a proud mother of little crafters who SO want to make me feel special, this is what I found:


Mother's Day Newspaper


I found this template that you can print off at marthastewart.com and search:"mother's day newspaper". Its a fun, unique way for your kids to show their love to the best moms in the world, theirs!! Hope you have fun this weekend giving and recieving love! Happy Mother's Day to all the hard-working, guilt-ridden(don't we all feel guilt?) mothers in the world.


Tuesday, April 19, 2011

Craft of the Week-7

So usually for the "COTW" I go on my favorite websites and see which ones are do-able and share them with you. This week I let my 6 year old Emma pick and this is the one she chose!
DIY Orange Soap

you will need:

- assorted citrus, berries, or herbs

- paper coffee filters, if using herbs

- clean, dry containers like juice boxes or yogurt cups

- heat resistant glass measuring cup or bowl

- non-stick spray


- glycerin soap base (note:do NOT try to cross the boarder with that. They think its explosives. funny story)


The instructions shown are just for the citrus soap. Feel free to go to marthastewart.com for the other instructions.


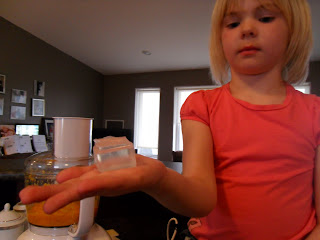
1. Puree oranges(i used 4 christmas oranges and my food processor)


2. To determine how much glycerine soap base you need, fill mold(I used an empty juice box) with water, then pour it into your measuring cup. Dump the water and dry out your measuring cup.


3. Cut up your clear glycerin into cubes and melt it 30 seconds at a time in the microwave. Make sure it does not boil, or it will turn to dough...and smell bad....

4. Once its all melted, add your orange puree(I did 2 tbsp) and stir. Then pour your soap into your mold and let it sit at room temp for about 3 hours.

Thursday, April 14, 2011

Craft of the Week-6

So as you can tell, I'm a little behind with my "craft of the week" so I tried to find a REALLY good one for you guys!

With Easter on fast approach, I have been "slightly" annoyed at all the attention going to chocolate(one of my weakness') and bunnies. I've been trying to stress to my kids the importance of remembering Jesus dying for our sins and that it is so very special that he loved us so much. Its very easy to "remember" Jesus, but do we really think about it? I have had people near to me pass away and have always struggled with the thought of them being forgotten. How much MORE should we be remembering what Jesus did for us?!


This craft is meant for just any old book, but for those of you who have little ones with their own bibles(and feel ambitious enough), to make this cover for their bibles and I encourage you while you are doing this craft, to talk about Jesus. He loves us soo much.


Book Blankets

(please read ALL of the instructions before you start, if you want to do the optional pen holder, or pocket. It tricked me!)


...you will need:

- felt (or, a fun fabric!)

- scissors

- ruler

- pins

embroidery needle and thread(feel free to call me, I have TONS)

- button(optional)

- self adhesive Velcro dot(dollarama)


1. To make a cover, open your chosen book and measure the width and height. Add one inch to each measurement and cut out a piece of felt with those dimensions. For the inside flaps, cut two additional pieces of felt the same height as the main piece and two0thirds the width of the closed book's front cover.


2. Lay an inside flap on top of each end of the main piece and pin the flaps and the main piece together. With embroidery thread, sew a running stitch about 1/4 inch to 3/8 inch from the edge around the entire border.


3. If you like, add one of these extras:


Notebook pocket: Before attaching the inside flaps, cut a piece of felt that's 1 1/2 inches wider and 1/2 inch shorter that's your notepad. Sew it in the center of what will be the front cover of the book.


Faux Button Closure: Before attaching the inside flaps, cut a strap that's 1 1/2 inch wide and as long as the width of an inside flap. Sandwich the strap between the back flap and the cover and pin it in place, then sew around the end of the strap and sew on a button. Affix a self-adhesive Velcro dot to the strap and the front of the cover.


Pen holder: After the cover is finished and on the book, cut a 1 3/4 inch square out of felt. With the book closed, lay the square over a pen on the book's spine and pin it in place. Take the cover off the book, then sew on the square.